Wednesday, January 11, 2012

Chocolate Covered Marshmallow!! Super easy and great for Valentine’s day!

OLYMPUS DIGITAL CAMERA

I found Chocolate Covered Peeps during my first pregnancy and I loved them! But, they are kind of expensive (for this cheap girl anyway). So, I decided to make my own. I used cookie cutters to make the shapes, big and small. They are really fun and everyone loves them.

What you will need:
· Homemade Marshmallow. I used my recipe found here.
· ¼ cup of Corn Starch and ¼ cup Powdered Sugar mixed together. This keeps the marshmallows from sticking.
· Cookie cutters. Any shape and size will work
· A dipping tool or just a fork
· A microwave safe bowl and a brush
· 16 oz of Milk or Dark Chocolate Candy Melts
· A Silpat or Wax paper
· For decoration, I used a little white chocolate and heart sprinkles.
 
Steps:
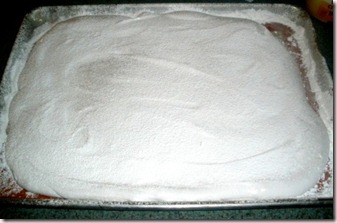
1) Make your marshmallow. I made the marshmallow and poured it into a sheet pan with a Silpat on the bottom. The pan was covered in a mixture of equal parts corn starch and powdered sugar (like my recipe says to use). Allow the marshmallow at least 4 hours to set up. I waited overnight.

OLYMPUS DIGITAL CAMERA

2) Sprinkle a cutting board with the corn starch and powdered sugar mixture. Peel the marshmallow off the pan and place on the cutting board. If you used a Silpat, remove that too.

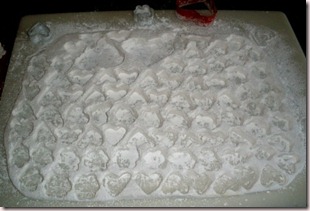
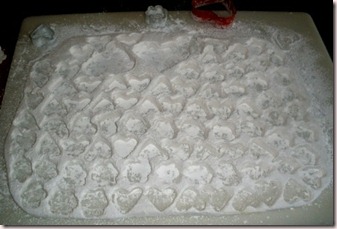
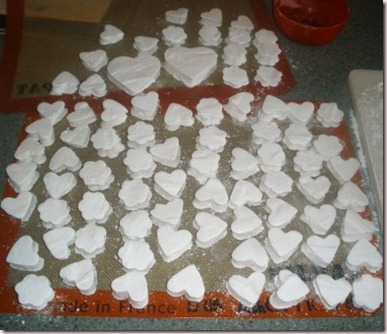
3) Now, the fun begins!! Dip your cookie cutter in the corn starch and powdered sugar mixture. Press them into the marshmallow (just like making sugar cookies). Make sure you press straight down. Place the cut marshmallows on a Silpat or wax paper that is dusted with the corn starch and powdered sugar mixture.

OLYMPUS DIGITAL CAMERA
Aren’t they cute?
 
OLYMPUS DIGITAL CAMERA
The leftovers. Don’t throw it away. Cut them up and use in hot cocoa or just give the whole thing to your kids and give them a huge sugar high ;)

4) Once they are all cut out, brush off the extra corn starch and powdered sugar mixture with the pastry brush. Do this over the sink. It can get messy.

5) Now, they are ready for chocolate! I used Milk Chocolate Candy Melts. Follow the instructions on the back of the package or follow mine.

6) Place a marshmallow in the chocolate one at a time and pull them out with your fork. Be sure to tap off the excess chocolate. Place on your Silpat or Wax paper.

7) Now, decorate all you want! I used a little white chocolate and sprinkles to decorate mine for Valentine’s Day.

OLYMPUS DIGITAL CAMERA
I made large hearts for Mr. Wonderful. I used a small zip-lock bag to pipe with white chocolate, but the piping isn’t very good. Learning to pipe with chocolate and icing is one of my New Year’s resolutions. They still taste great!

OLYMPUS DIGITAL CAMERA
I just love how cute these are! I Hope you get a chance to try these!

Monday, January 9, 2012

Homemade Peeps! Have a fun treat all year round and in any shape you want!!

 
OLYMPUS DIGITAL CAMERA

I love peeps! They always make you feel like a kid. It’s marshmallow and sugar. Who doesn’t love those two things?!? Well, I found a way to make peeps in any shape, size and color. They are really easy and here is how to do it:
 
What you will need:

· Marshmallows (I used my recipe found here). Homemade marshmallows are the best! So much better than the store bought.
· Cookie Cutters. Any size and shape will work. I used a small heart and flower. But, think of the endless options you could do!!
· A pastry brush
· ¼ cup of Corn Syrup
· Fine to regular colored sugars. The finer the sugar, the better. I wouldn’t use sanding sugar. That would be super course and would not cover very well.

OLYMPUS DIGITAL CAMERA


Steps:

1) Make your marshmallow. I made the marshmallow and poured it into a sheet pan with a Silpat on the bottom. The pan was covered in a mixture of equal parts corn starch and powdered sugar (like my recipe says to use). Allow the marshmallow at least 4 hours to set up. I waited overnight.

OLYMPUS DIGITAL CAMERA

2) Sprinkle a cutting board with the corn starch and powdered sugar mixture. Peel the marshmallow off the pan and place on the cutting board. If you used a Silpat, remove that too.

3) Now, the fun begins!! Dip your cookie cutter in the corn starch and powdered sugar mixture. Press them into the marshmallow (just like making sugar cookies). Make sure you press straight down. Place the cut marshmallows on a Silpat or wax paper that is dusted with the corn starch and powdered sugar mixture.

OLYMPUS DIGITAL CAMERA
Aren’t they cute?
 
OLYMPUS DIGITAL CAMERA
The leftovers. Don’t throw it away. Cut them up and use in hot cocoa or just give the whole thing to your kids and give them a huge sugar high ;)

4) Once they are all cut out, brush off the extra corn starch and powdered sugar mixture with the pastry brush. Do this over the sink. It can get messy.

5) Pour your sugars into small bowls. And pour your corn syrup into a small bowl too.

6) Cover a marshmallow in corn syrup (you can use a brush, but I found that using your fingers was easier). I covered 5 at a time.

7) Place the marshmallow in the sugars and cover completely.

OLYMPUS DIGITAL CAMERA

8) Put on a Silpat or Plate to ‘dry out’ a bit.

clip_image006

There you go! Homemade peeps!! They are very fun to make! Next time I think I will make a giant peep. Hope you try them soon!!!

Thursday, January 5, 2012

Crispy Bacon Chocolates!! New spin on a treat!

 
OLYMPUS DIGITAL CAMERA

So, I love bacon. I really, really love bacon. And I love sweet and salty things. I was watching a cooking show called ‘Bitchin Kitchen’ (Love the show, hate the name) and she did a treat similar to this. So, I decided to make some and try them out. They are creamy, crispy, porky, salty and sweet all at the same time. I took a batch of these to share with a bunch of teenage girls. And guess what! They loved them!!! Give them a try!

OLYMPUS DIGITAL CAMERA

What you will need:
· 5 strips of Bacon
· 1 cup of Rice Krispie Cereal
· 16 oz of Milk Chocolate
· A silicone ice cube tray (I used a heart shaped tray that I got at the dollar store)
· A little chocolate and a sandwich bag for decoration (I used pink chocolate for Valentine’s Day)
 
Steps:
1) Cook your bacon. I used frozen bacon (I always store my bacon in the freezer) and cut them into ½ inch strips. I then sprinkled them with a tablespoon of brown sugar and placed them in a 375 degree oven for 10-15 minutes, stirring them around every 5 minutes.

OLYMPUS DIGITAL CAMERA

2) Place the bacon bits on a paper towel and allow to cool completely. Once cool, chop the bacon into fine bacon bits. I had about 1/3 cup of bacon bits when I was done chopping.

OLYMPUS DIGITAL CAMERA

3) Melt your chocolate according to the instructions on the package or follow mine.

4) Mix the bacon and cereal into the chocolate.

OLYMPUS DIGITAL CAMERA
It’s not the prettiest mixture, but they are really cute at the end!

5) Fill your ice cube tray with the mixture and tap the tray on the counter to make sure there are no air bubbles.

6) Place the tray in the fridge for 30 minutes (or in the freezer for 5 minutes) to allow the chocolate to harden.

7) Just pop the chocolates out of the mold and decorate with a little melted chocolate. I also used tiny heart sprinkles.

OLYMPUS DIGITAL CAMERA

The biggest challenge is whether or not to tell people there is bacon in them. It’s kinda fun to surprise people with a porky treat. But, this is coming from a girl that put peas in a chocolate to surprise a friend that hates peas. Yeah, I’m evil.

Enjoy!!!!
OLYMPUS DIGITAL CAMERA

Tuesday, January 3, 2012

Fancy Oreo and Mint Oreo Truffles! Learn how to make the perfect dipped truffle!

OLYMPUS DIGITAL CAMERA

Every year I give out boxes (well, I use Chinese food containers) full of candy to friends. One of the favorites is Oreo truffles and Mint Oreo truffles. They are super easy and I just learned a new way to dip them and get the perfect round shape. So, I thought I would share!

For the Oreo Truffles:

· A package of Oreos (or any chocolate sandwich cookie)- Not the double stuffed
· About ¾ of softened 8 oz. package of Cream Cheese
· 16 oz of White Chocolate (I used candy melts from Wilton) and 4 oz of Dark Chocolate
· Lollipop sticks
· Candy cups
· a food processor (or blender)
 

For Mint Oreo Truffles:

· A package of Mint Oreos (or any chocolate sandwich cookie)
· About ½ of softened 8 oz. package of Cream Cheese
· 8 oz of White Chocolate (I used candy melts from Wilton), 8 oz of Green Colored Chocolate and 4 oz of Dark Chocolate
· Lollipop sticks
· Candy cups (mini cupcake wrappers)
· a food processor (or blender)
 

Steps to Make the Oreo Truffles (the inside):

1) Process (or blend) the whole package of Oreos until it is a fine crumb. The finer, the better.

2) Place the crumbs in a mixing bowl and add the softened cream cheese to the bowl (6 oz for Oreo and 4 oz for Mint Oreo truffles). Sometimes my cream cheese isn’t that softened, so I just have to mix a little longer. No big deal.

3) With a spoon or hand mixer, mix the two ingredients together.
 

Steps to make the perfect truffles:

1) Roll your mixture into 1 ½ inch balls. Place in the refrigerator for an hour.

OLYMPUS DIGITAL CAMERA

2) Melt your Chocolate according to the instructions on the package or follow mine! For the original Oreos, just melt 16 oz of White chocolate. For the mint Oreos, mix together 8 oz of green and white and melt together.

3) Retrieve your Oreo balls. Dip a tip of each stick into the chocolate and insert half way into the ball.

OLYMPUS DIGITAL CAMERA

4) Time to Dip! Dip the balls into the chocolate. DO NOT STIR! Try to cover the whole ball in one dipping. Tap off the excess by gently tapping the stick against your wrist or the edge of the bowl. Wipe the excess chocolate on the bottom of the truffle and on the stick off with your finger. You want to be able to pop the truffle off the stick as easily as possible. Place in the drying rack (or a block of Styrofoam).

5) Now, for the Original White Oreo balls, I dipped them twice. I like a true white color. But, for the Mint ones, I only had to dip them once. Make sure everything is covered. Any little hole will cause the truffle mixture to leak.

6) After the chocolate has set, time to decorate! Melt the dark chocolate; I then poured it into a sandwich bag. I cut the very tip of the corner of the bag off. I then squeezed the baggie back and forth over the pop to create a design. Allow to dry.

7) Re-melt your chocolate (white or the green-white mixture). Now, carefully remove the lollipop stick. Dip the bottom of the truffle into the melted chocolate and place in your candy cups. This step will ensure that the bottom is sealed and the candy cup will stay with the truffle.

OLYMPUS DIGITAL CAMERA
The green one is the mint Oreo and the white one is the original Oreo truffle. The mint ones are amazing!!!

You now have a professional looking truffle that anyone would be happy to receive! Good luck and enjoy them!!!