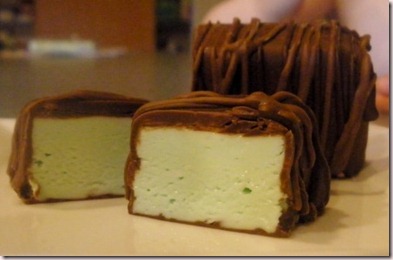
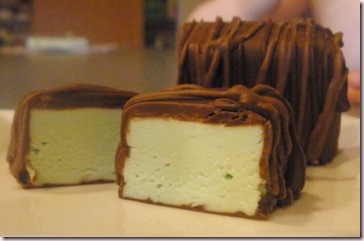
Mr. Wonderful loves all things mint and chocolate. So, here is a fluffy, minty treat. I used a combination of dark and milk chocolate to coat the centers. I’m not a fan of just dark chocolate and just milk chocolate was too sweet. But a mixture was just right (Why do I feel like Goldilocks?). Here it is:
What you will need:
· 3 cups White Granulated Sugar
· ¾ cup light Corn Syrup
· ¾ cup water
· 1/8 teaspoon of Salt
· 3 egg whites (Don’t worry. They will get cooked)
· ½ cup of White Chocolate chips
· 8 oz bag of Milk Chocolate Candy Wafers ( I used Wilton Light Chocolate Wafers)
· 8 oz bag of Dark Chocolate Candy Wafers ( I used Wilton Dark Chocolate Wafers)
· Green food coloring
· Mint Flavored Extract
Tools you need:
· Heavy bottomed 3 quart pot with lid
· Candy Thermometer
· Mixer and mixing bowl. I also used a Wisk attachment.
· 13 x 9 pan sprayed with cooking spray (not the butter flavored one!)
· Bowl and fork for dipping
· Wax Paper or
Silpat Non-Stick Baking Mat
(my favorite!!)
Steps:
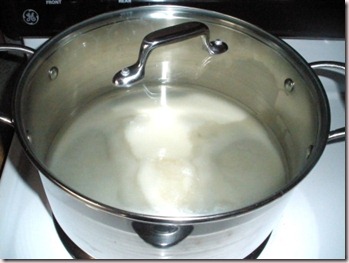
1) In a 3 quart pot, add your sugar, water, syrup and salt. (I don’t even stir it together. I just add them and turn on the heat.)
2) Place the lid on the pot and turn your stove to medium heat. Allow to cook for ten minutes. Do Not Lift The Lid!
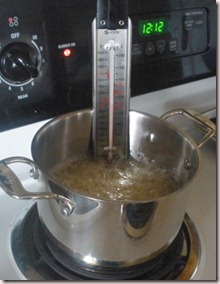
3) Once the ten minutes are up, remove the lid and attach your candy thermometer.
4) While the sugar cooks, beat three egg whites to stiff peaks and set to the side.
5) Cook the sugar to 270 degrees. Now, if you don’t live at sea level, you will have to change the temperature. For every 1000 feet above sea level, subtract two degrees. I live at about 5000 feet above sea level, so I cooked it until 260 degrees.
6) Right before your sugar gets to the goal temperature, whip the eggs again to make sure they haven’t separated.
7) Using your mixer set on low; gradually add the sugar to the whipped egg. It took me almost five minutes to add the sugar slowly to the eggs.
8) Once all the sugar syrup is added, turn the mixer up to high and whip until the mixture looks like dough. It should be a little thicker than marshmallow cream and be pulling away from the bowl a bit. It took my Kitchen Aid mixer 13 minutes to get to the ‘dough’ state.
9) Add your white chocolate chips, at least 8 drops of green food coloring and a teaspoon of mint flavored extract to the ‘dough’. Once you add the chocolate, the mixture will not thicken anymore. So, make sure the ‘dough’ is thick before you do this step. Mix until the chocolate has melted and mixed into the ‘dough’.
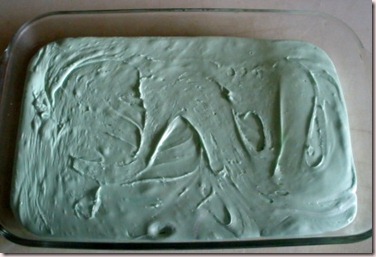
10) Pour the mixture into a 13 x 9 pan that has been
sprayed with non stick spray (not butter flavor!).
11) Place in the refrigerator for 30 minutes to an hour.
I got to play with these cuties while I waited for the dough to cool. Meet the Chipmunk. Yep, I nicknamed my kids monkey and Chipmunk.
12) Remove the candy from the pan. The whole thing should come out as a whole.
13) Cut your candy into mini candy bar shapes. I got at least 2 dozen fun-size candy bars.
14) Melt your light and dark chocolates following the package instructions or
follow my steps for tempering.
15) Using a fork or dipping tool, dip your candy into the chocolate and place on a Silpat or wax paper.
16) I used a little chocolate in a bag to make a design on my chocolates.
If you like this one, here is a
link to the original 3 musketeer bar!
Mr. Wonderful loves all things mint and chocolate. So, here is a fluffy, minty treat. I used a combination of dark and milk chocolate to coat the centers. I’m not a fan of just dark chocolate and just milk chocolate was too sweet. But a mixture was just right (Why do I feel like Goldilocks?). Here it is:
What you will need:
· 3 cups White Granulated Sugar
· ¾ cup light Corn Syrup
· ¾ cup water
· 1/8 teaspoon of Salt
· 3 egg whites (Don’t worry. They will get cooked)
· ½ cup of White Chocolate chips
· 8 oz bag of Milk Chocolate Candy Wafers ( I used Wilton Light Chocolate Wafers)
· 8 oz bag of Dark Chocolate Candy Wafers ( I used Wilton Dark Chocolate Wafers)
· Green food coloring
· Mint Flavored Extract
Tools you need:
· Heavy bottomed 3 quart pot with lid
· Candy Thermometer
· Mixer and mixing bowl. I also used a Wisk attachment.
· 13 x 9 pan sprayed with cooking spray (not the butter flavored one!)
· Bowl and fork for dipping
· Wax Paper or
Silpat Non-Stick Baking Mat
(my favorite!!)
Steps:
1) In a 3 quart pot, add your sugar, water, syrup and salt. (I don’t even stir it together. I just add them and turn on the heat.)
2) Place the lid on the pot and turn your stove to medium heat. Allow to cook for ten minutes. Do Not Lift The Lid!
3) Once the ten minutes are up, remove the lid and attach your candy thermometer.
4) While the sugar cooks, beat three egg whites to stiff peaks and set to the side.
5) Cook the sugar to 270 degrees. Now, if you don’t live at sea level, you will have to change the temperature. For every 1000 feet above sea level, subtract two degrees. I live at about 5000 feet above sea level, so I cooked it until 260 degrees.
6) Right before your sugar gets to the goal temperature, whip the eggs again to make sure they haven’t separated.
7) Using your mixer set on low; gradually add the sugar to the whipped egg. It took me almost five minutes to add the sugar slowly to the eggs.
8) Once all the sugar syrup is added, turn the mixer up to high and whip until the mixture looks like dough. It should be a little thicker than marshmallow cream and be pulling away from the bowl a bit. It took my Kitchen Aid mixer 13 minutes to get to the ‘dough’ state.
9) Add your white chocolate chips, at least 8 drops of green food coloring and a teaspoon of mint flavored extract to the ‘dough’. Once you add the chocolate, the mixture will not thicken anymore. So, make sure the ‘dough’ is thick before you do this step. Mix until the chocolate has melted and mixed into the ‘dough’.
10) Pour the mixture into a 13 x 9 pan that has been
sprayed with non stick spray (not butter flavor!).
11) Place in the refrigerator for 30 minutes to an hour.
I got to play with these cuties while I waited for the dough to cool. Meet the Chipmunk. Yep, I nicknamed my kids monkey and Chipmunk.
12) Remove the candy from the pan. The whole thing should come out as a whole.
13) Cut your candy into mini candy bar shapes. I got at least 2 dozen fun-size candy bars.
14) Melt your light and dark chocolates following the package instructions or
follow my steps for tempering.
15) Using a fork or dipping tool, dip your candy into the chocolate and place on a Silpat or wax paper.
16) I used a little chocolate in a bag to make a design on my chocolates.
If you like this one, here is a
link to the original 3 musketeer bar!

